Create a New Group Invitation
Instructions
- Sign into your account.
- Select the desired tenant.
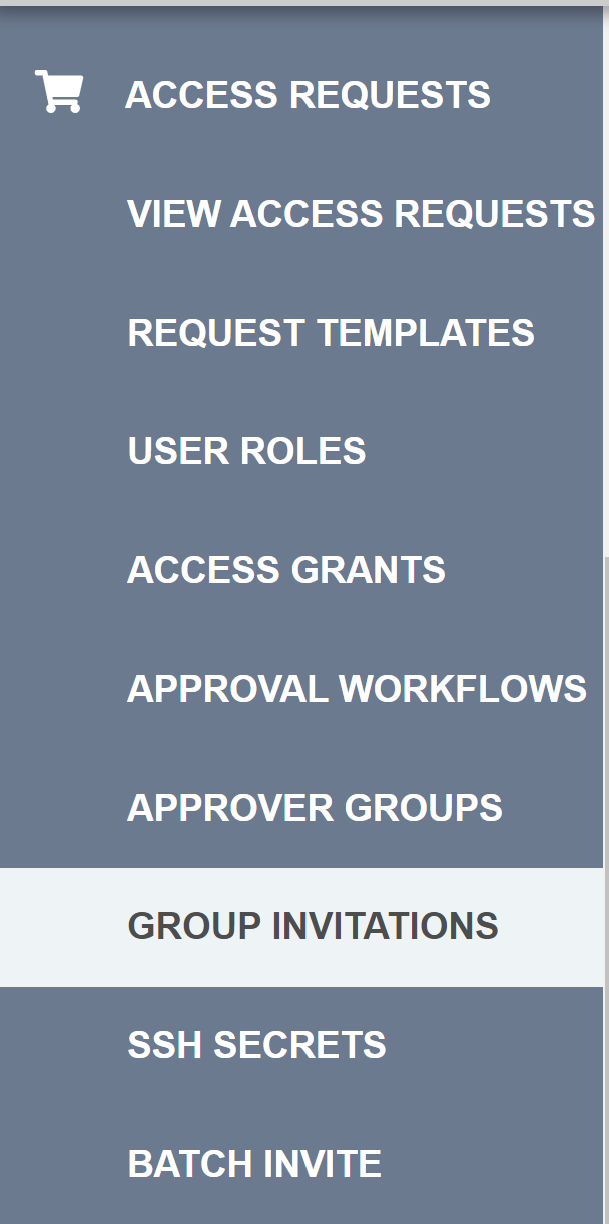
- Go to the “ACCESS REQUESTS” section on the left side of the screen.
- Select “GROUP INVITATIONS” on the left side of the screen.
- All the way on the right, click on the ADD INVITATION button.

- Select a Group from the dropdown search box.
- Enter the User Email addresses for the users you want to add to the group.
- Enter an Identity Issuer and Application URL.
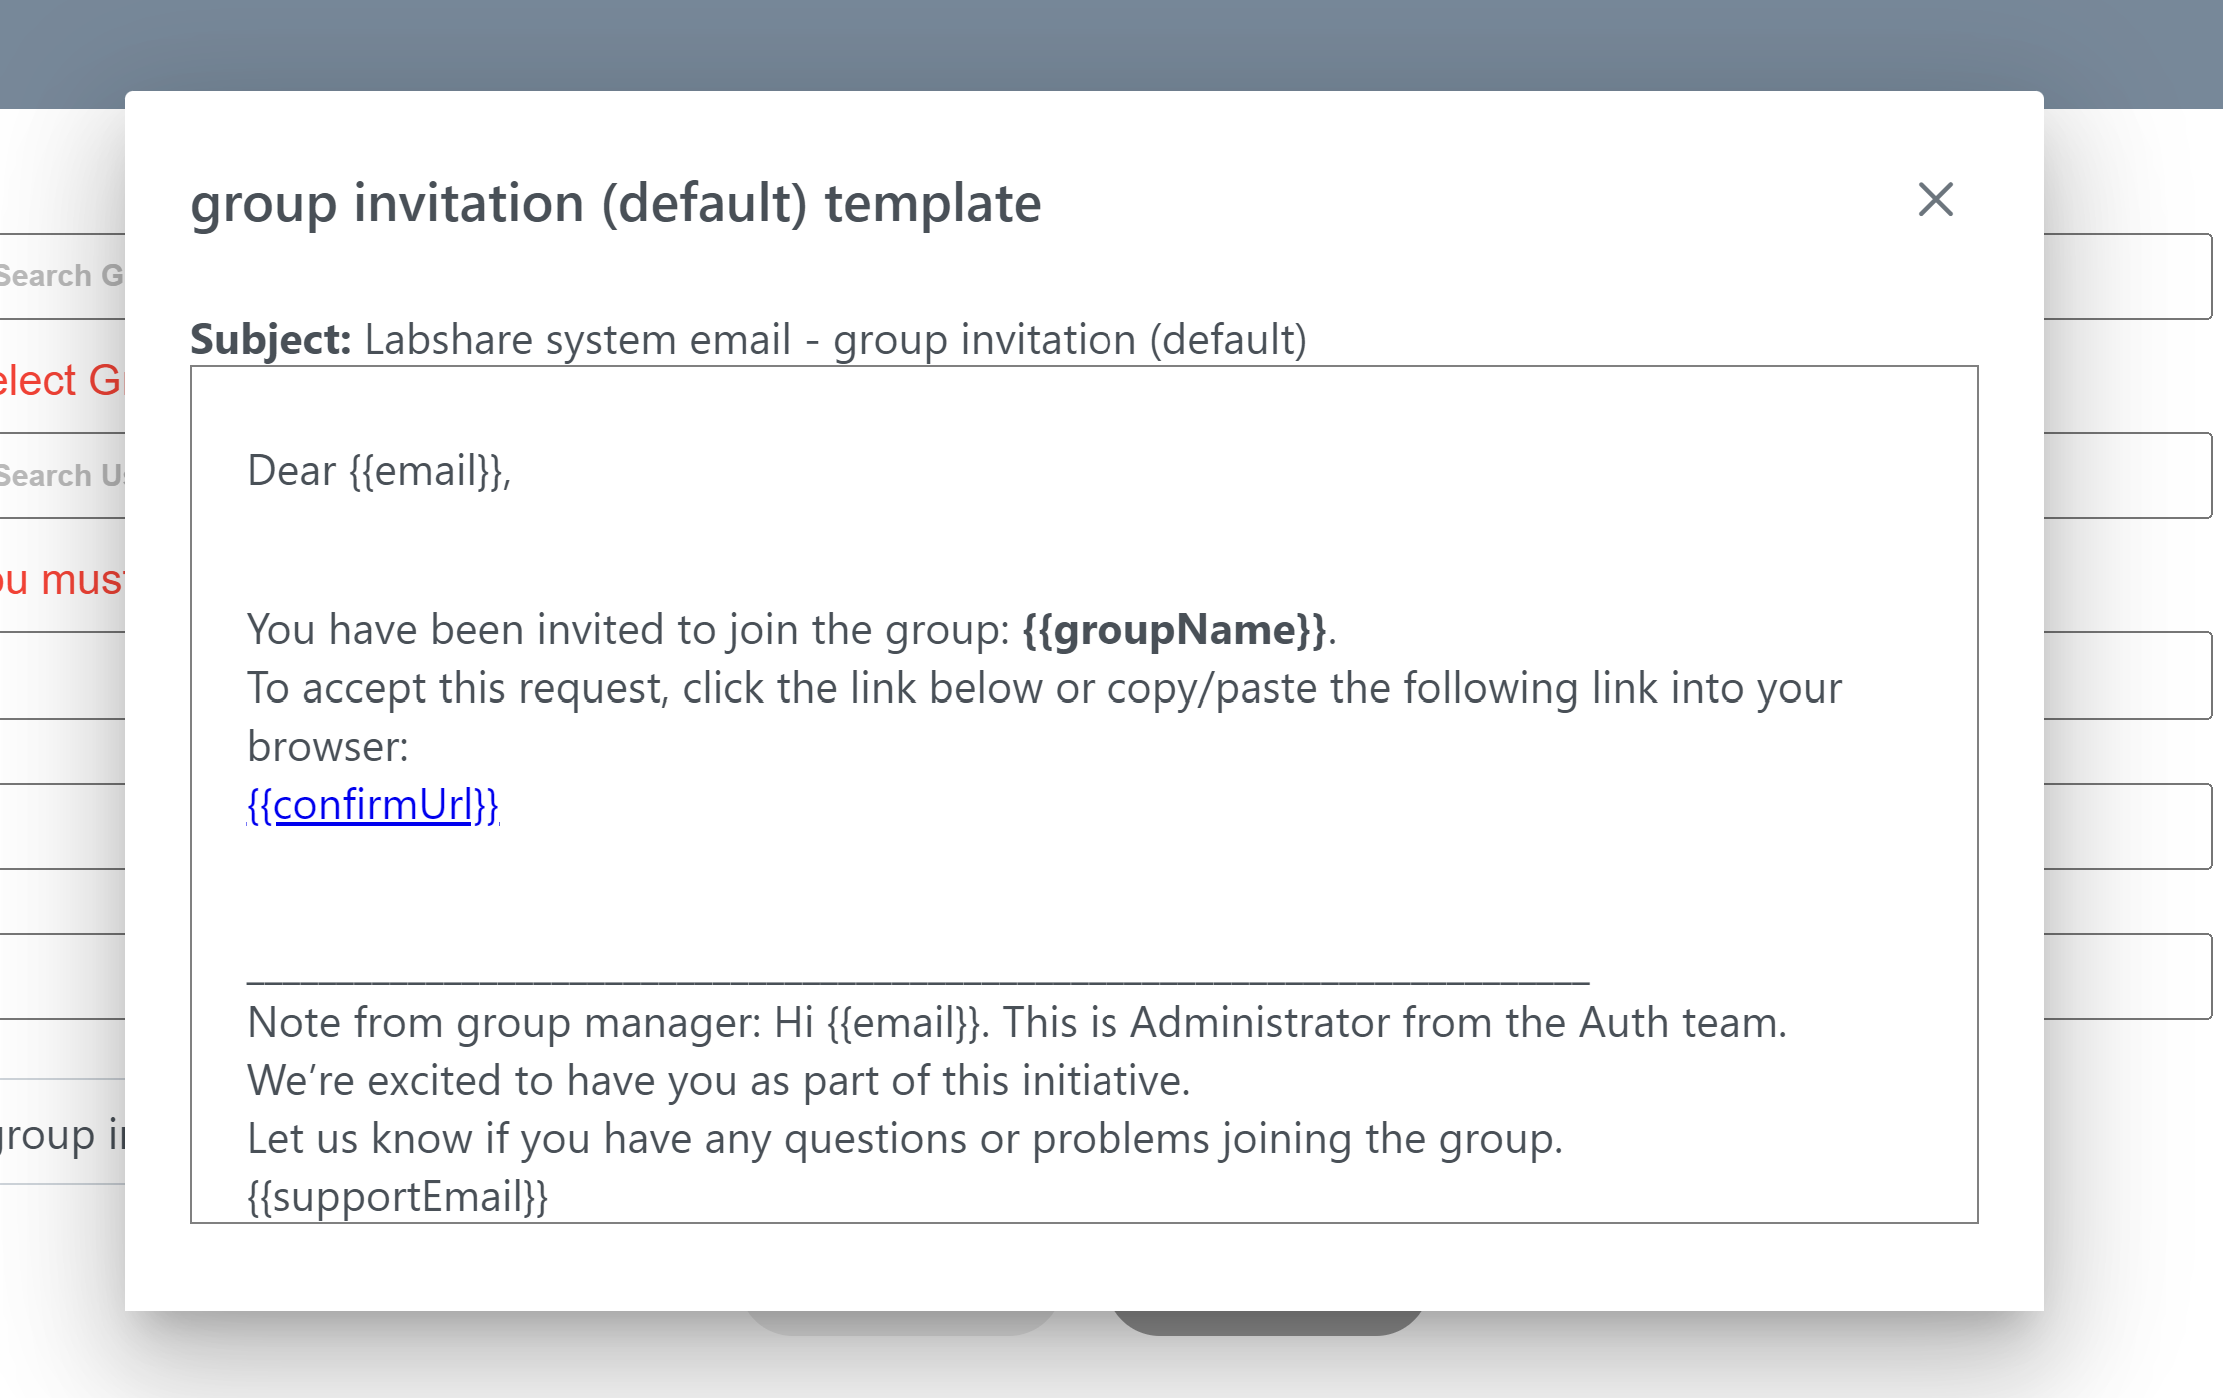
- Select an Email Template to be sent to the users you are adding to the group.
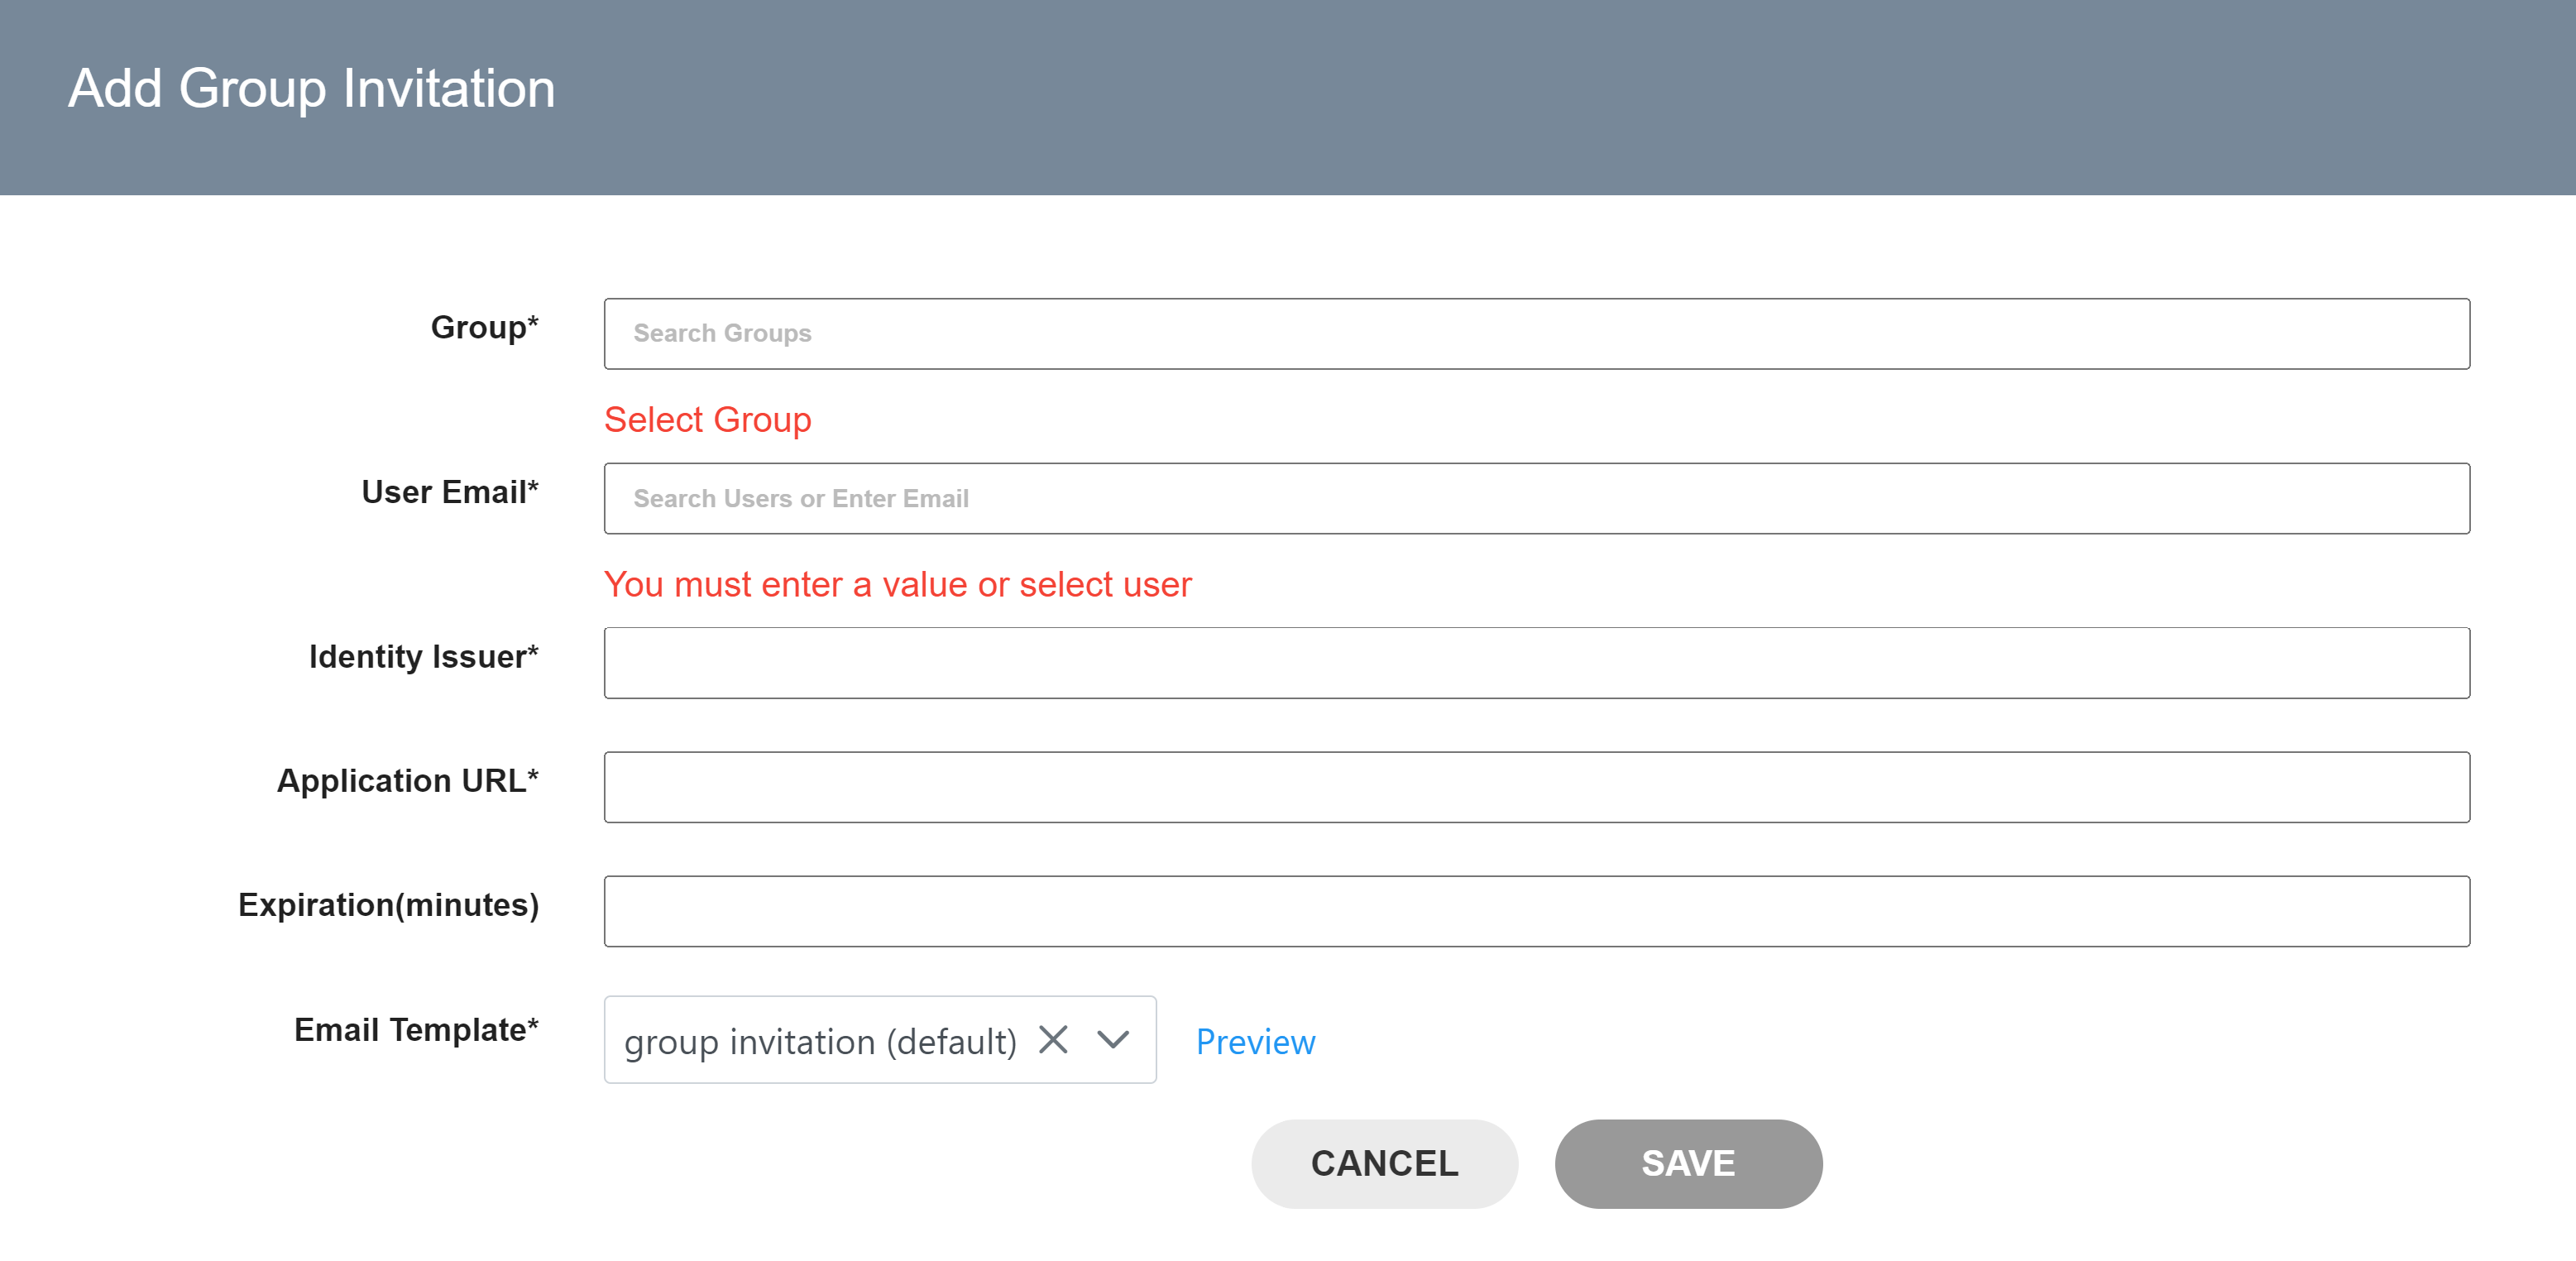
- Preview the email being sent to the group using the Preview button.