Data Import and Export
You cannot start a robust, reproducible research project without having easily accessible and interpretabile data. Our hope is that using our tool will make your analysis activities more impactful and detail focused. The first and last steps of using our app involve Data Import and Export.
This page is the site for identifying where your data is loaded from, and where your results will be sent to. As the app is being built on NIDAP, the data you wish to work with must be moved to a NIDAP dataset.
Importing Data
If you have used the Getting Started guide you will have learned that the DMAP group, in addition to deploying this app, has generated for you a dataset in your groups’ project called Input. We will have instructed you to import your data files into this dataset and treat it like a folder in your computer’s file explorer system. Keeping your data on NIDAP is an effective way to keep track of versions, share with colleagues, and free your workflow from personal storage devices.
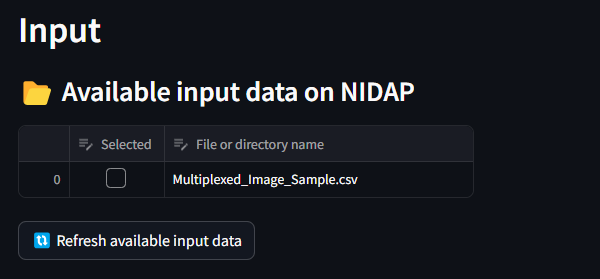
While the data files are available on NIDAP ecosystem, we do require one extra step to bring them into the MAWA’s environment. In order for MAWA to make use of the data, we must use the top half of the Data Import and Export called Input. In the image below, we can see a table of files on the left, a table of files on the right, and a button between them. The files on the left are the files on NIDAP and the files on the right are the files that are available for MAWA to use. The aim here is to allow the user to only select which file they want to load into MAWA in a specific instance. This can be done by selecting one or more files in the left table and then clicking the Load selected (at Left) input data button in the center of the screen. This will load data into the MAWA environment and will populate the list on the right. If you have recently added a new data file to your NIDAP dataset, and it is not appearing in the NIDAP file list, try clicking the Refresh available input data button below the NIDAP input data table. If at any point you feel a need to delete a file from the right, this can be done by selecting it in the list and clicking the delete selected button below the table.

Exporting Data
Again, if you have read through the Getting Started guide you will have learned that DMAP group has also set up a NIDAP dataset folder for you named Output. This will be the home for your results, images, and updata datasets when they are generated in MAWA.
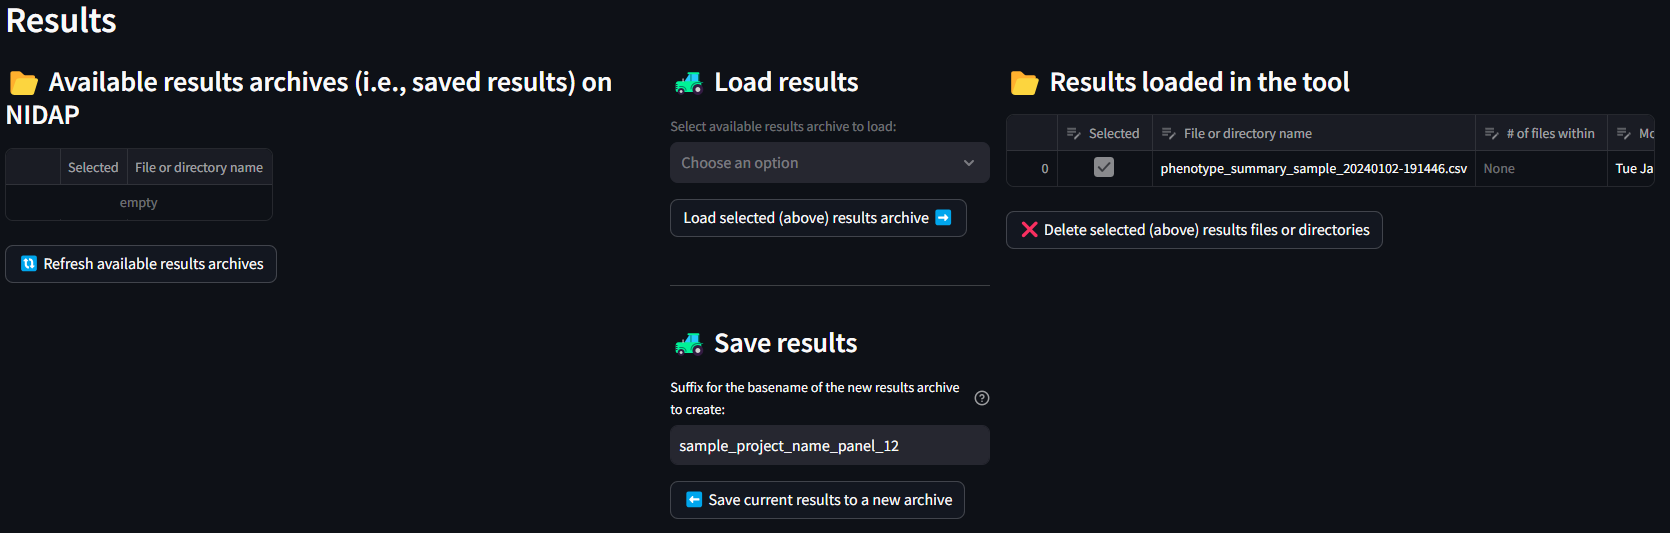
The second half of the Data Import and Export screen is titled Results. It contains a list of files on the left, a list of files on the right, and two buttons in between. As different result files are generated in MAWA, they will begin to populate the list on the right. When you are ready for files to be moved your your Output folder in NIDAP, select those files from the table on the right and click the button that says Save Current Results to new Archive,. This will save the files from the MAWA environment to your NIDAP dataset, and will populate the list of files on the left.
For this paradigm, you also have the option to add files from the NIDAP output folder, back into the MAWA environment. This can be done by selecting items from the left table, and clicking the Load Selected button. This may be useful if you want to load in some configuration files from an old session and reapply them to new data.